Coining the term 'idea music'
I am Pauli "Gwaur" Marttinen. I am the appointed composer for the Umbrella Project, though one other composer has also been invited to fill some of the stylistic gaps that I don't span. I specialize in music in the symphonic or otherwise classical sense. I am far for being a pro, but I'm aiming for professional studies in percussion and/or conducting.
At this point of the Umbrella Project, virtually no game exists. There's an incomplete graphics engine, the game and scripting engines are just being conceived, and the plot setting is only starting to get out of the "vague idea" state. This is the opposite of an ideal phase for making the score: I have no idea what I am making music for.
I have practically no mental image of where the project is headed to. There's too little concept art, 3D models, scripts or storyboards to follow. It is hard to get any inspiration that's directly linked to this game. If I make a piece of music for the game at this point, who knows if it will it be used in a cutscene or a playable place, or in the closing credits? Should I make it repeatable? Should I make other versions of it, for different situations?
It is of course never a bad idea to store ideas beforehand. Even if a piece I go ahead and finish now will ultimately be unused, ideas can be recycled. Maybe a new piece with a new structure but some same themes. Or the same structure and new themes in the same style. On the other hand, changing things may be difficult if, for instance, some pieces have music played with real instruments instead of computerized ones.
Something like this has been done at Studio Ghibli, a film studio that produces some of the most popular animated features. If you look for soundtracks of Ghibli's films, you might come across some albums subtitled "Image Album". These are albums of music inspired by storyboards and concept art, composed by the composer in the earliest phases of filmmaking, as opposed to music often being one of the last things to be made. With this, the composer has more time to fine-tune the music, discard some and make some new, according to the project leader's wish.
In our case, we are currently trying out something I might call "idea music" instead of image music, since we have no images yet. What happens right now is that the project coordinator asks me to make "something based on this idea". I try to follow that idea, make something, and suggest whatever I come up with. By now we have three pieces of music, but none of us knows exactly where and how to use them.
Things are starting out slow, and there are several reasons for it. None of us are professionals, and we have little experience on working on such an ambitious project. We live quite far away from each other, so we are relayed through the Internet and seldom meet in real life, but the Internet doesn't always do it for you. Also, frankly, my personal video game interests don't match with this one. ;)
Wednesday, May 19, 2010

Saturday, April 17, 2010
2010-04-18. Emission maps
Terrain generation from a height map
I spent some time pondering how to implement terrain to the engine. The choices were either heightmap-based or tile-based terrain. Tiles fit the engine better but our modeler already has enough work... We'd need a second modeler I guess.
The initial plan was to support multiple levels of detail (LOD) and draw areas farther away with less triangles. But I also wanted the terrain to have adaptive precision. Combining these two proved to be quite tricky.
Here are some results of the tessellation algorithm I wrote. The sand castle is only a test to see how the algorithm does. No castles like this in the real game, done with a heightmap at least.

The results are quite nice. This is the same with real shading:

Sadly, with adaptive terrain it's not easy to make the level of detail changes seamless. There would be unacceptable artifacts, pixels of the sky seen through artifacts in the height map. No wai.
Edges again!
Someone complained about the jaggy edges in the pictures. HDR rendering requires rendering to texture but rendering to texture with high precision doesn't support Multisample Anti-Aliasing (MSAA). This means there's not much I can do without a huge cost, like using Fullscreen Anti-Aliasing.
There is still hope, though. An OpenGL extension named GL_EXT_framebuffer_multisample could possibly save the situation. I must take another look at it later.
Inspired by the complainment aboud jaggy edges I decided to try enabling the edges again. Jagginess still persists but it might be a bit better.

Light bleeding
If you take a close look in the fullscreen version of the picture above you can see that the shadows aren't as soft as they used to be. This is because I encountered horrible light bleeding with the variance shadows. You can see some of it in the image below. Please don't mind the burnt terrain, it was a bug in the terrain normals.

Now this doesn't look much like a shadow, does it? This is why I replaced the shadows with a quick implementation of Percentage-Closer Shadows (PCF).
Emission textures
I watched some demos from Breakpoint 2010. One of them had very impressive lighting effects. I wondered if I could produce similar effects too.
This effect is done by giving a material a high emission factor so that it is self-lit. Now that its color is very bright the bloom filter of HDR rendering gives it a nice halo, making it look very bright.
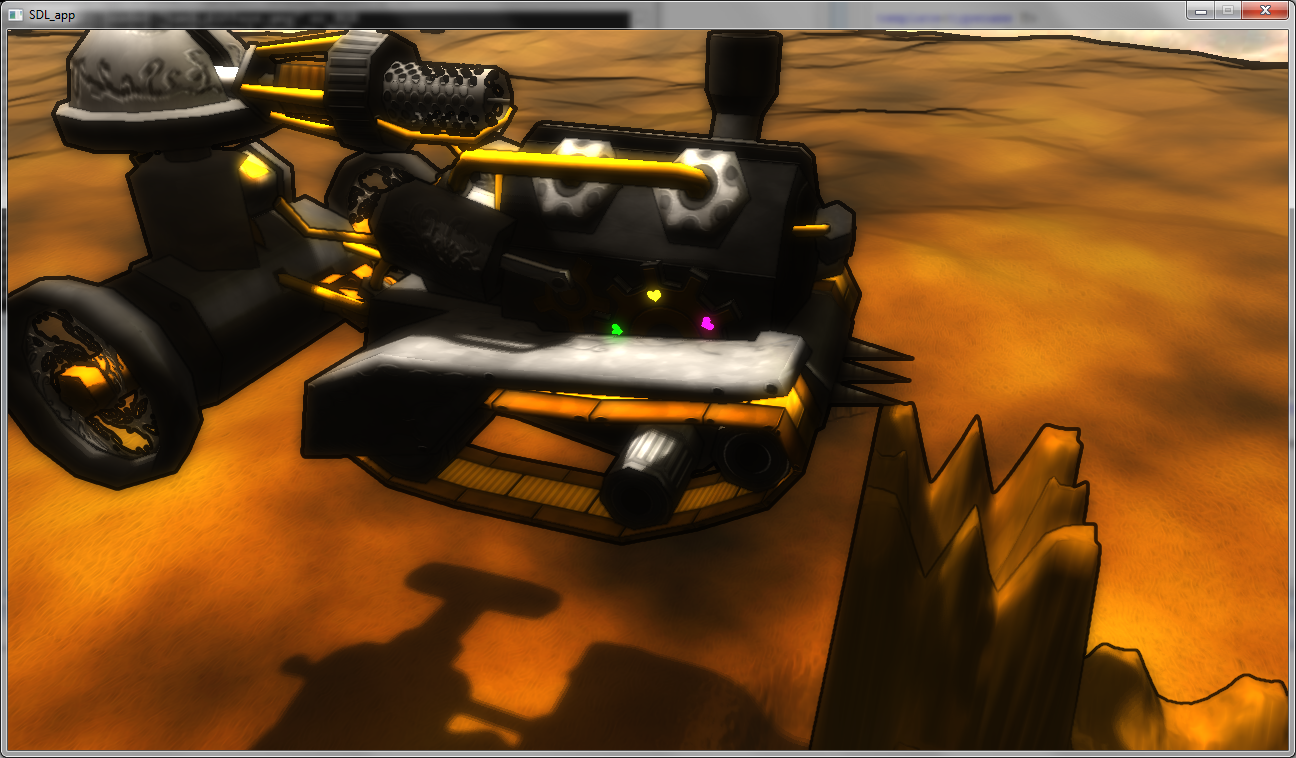
Our modeler, Juutis, had been asking for specular maps for some time. I hadn't implemented them yet since there were no free channels in our textures. But now I needed another channel for emission so it was clear that I needed to replace the traditional material-wide properties with an emission-specular-diffusion map.
Here are a few samples with some temporary hearts and a lit warning label. ;)


Cel-shading?
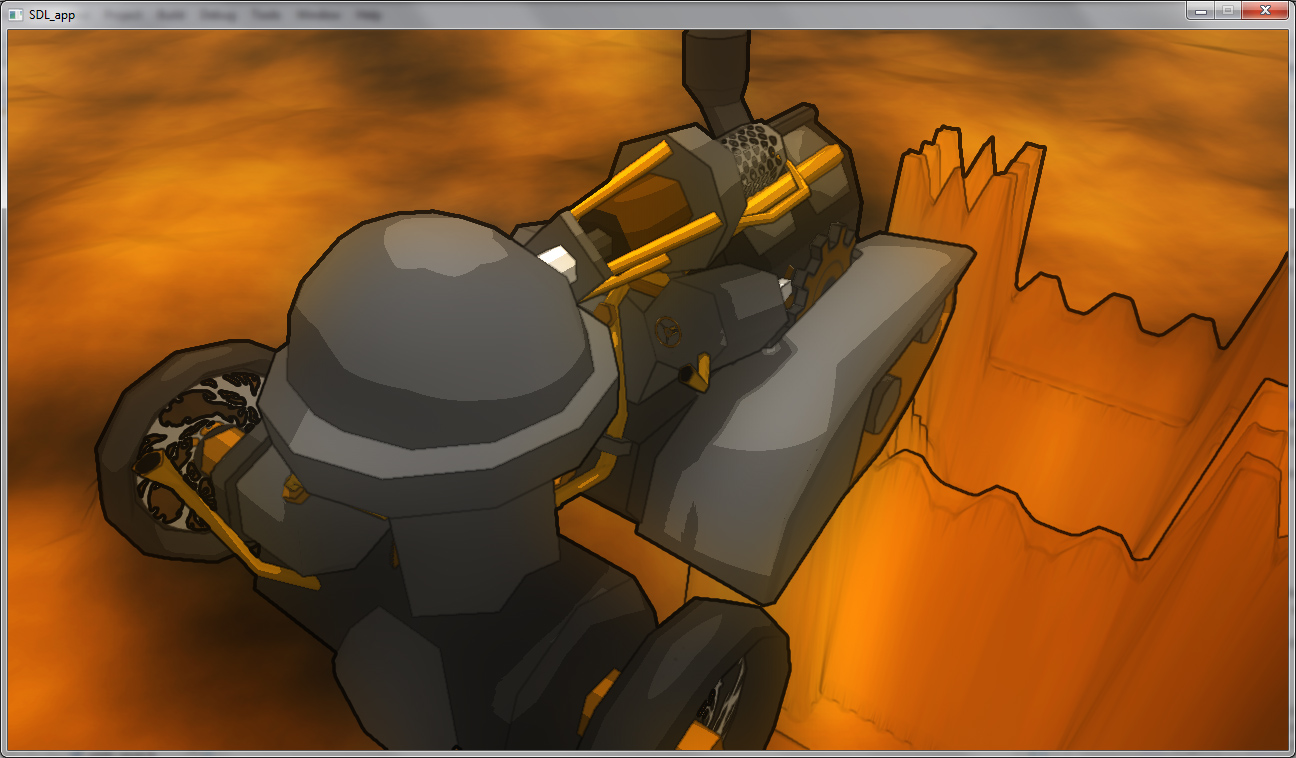
I took some time to play around with cel-shading. I'm not sure how well it fits a HDR rendering system, but at least I figured that cel-shading systems need a huge amount of parameter tweaking to get them to work in different lighting options.
I don't find these results very pleasing but I thought it would still be fun sharing them. But this is not the direction we'll be taking in the near future.


I spent some time pondering how to implement terrain to the engine. The choices were either heightmap-based or tile-based terrain. Tiles fit the engine better but our modeler already has enough work... We'd need a second modeler I guess.
The initial plan was to support multiple levels of detail (LOD) and draw areas farther away with less triangles. But I also wanted the terrain to have adaptive precision. Combining these two proved to be quite tricky.
Here are some results of the tessellation algorithm I wrote. The sand castle is only a test to see how the algorithm does. No castles like this in the real game, done with a heightmap at least.
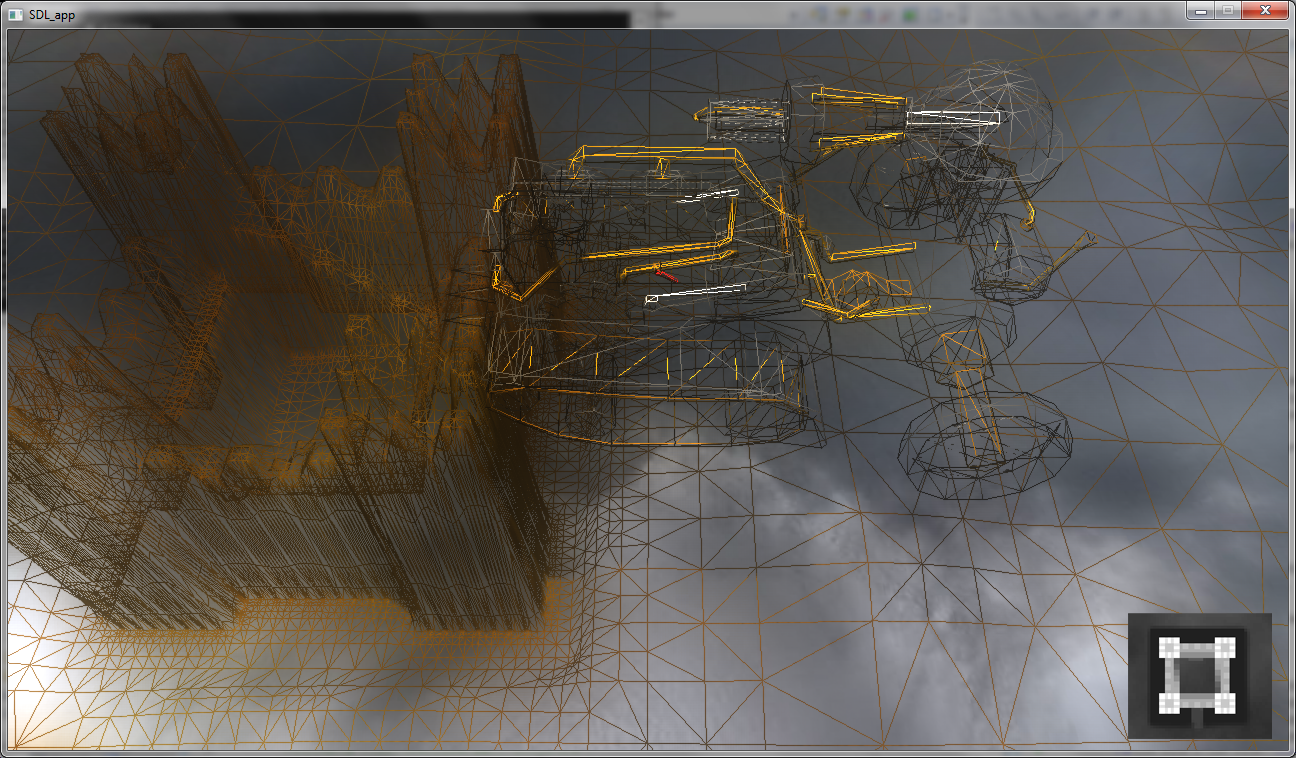
The results are quite nice. This is the same with real shading:
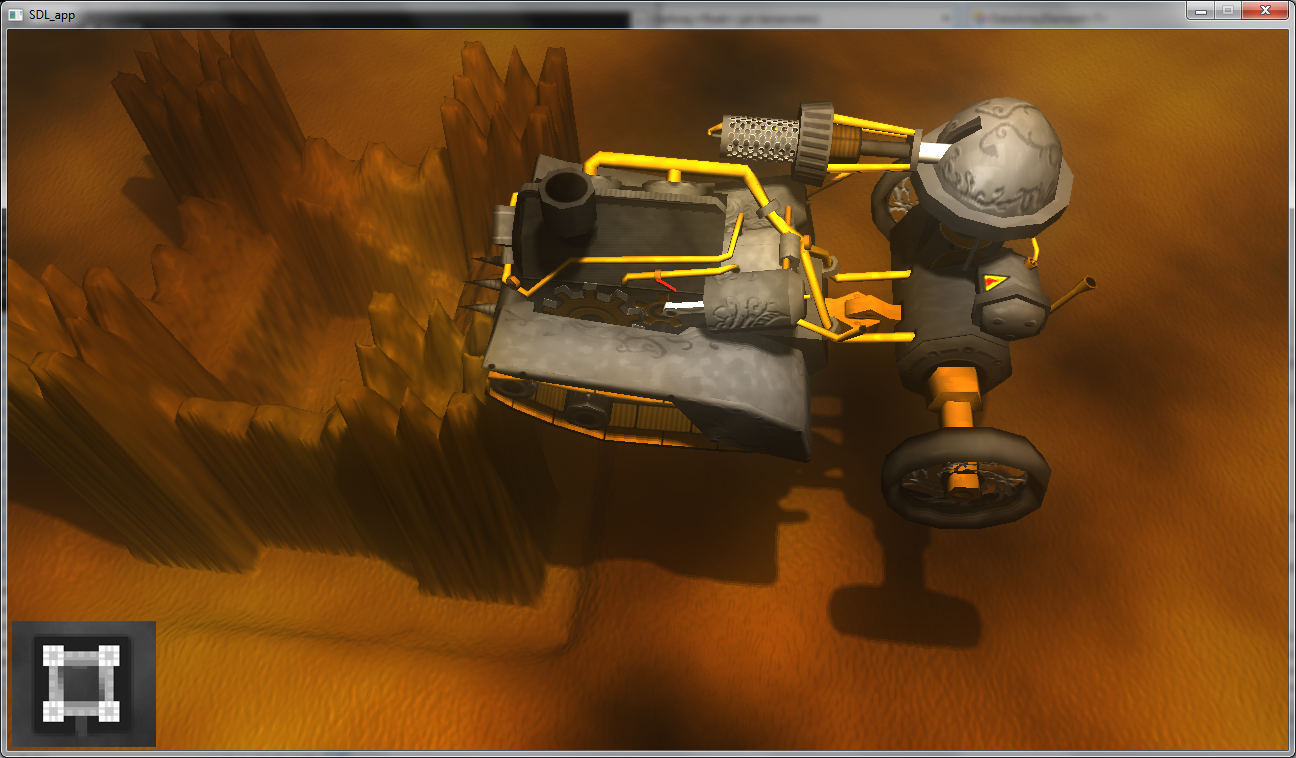
Sadly, with adaptive terrain it's not easy to make the level of detail changes seamless. There would be unacceptable artifacts, pixels of the sky seen through artifacts in the height map. No wai.
Edges again!
Someone complained about the jaggy edges in the pictures. HDR rendering requires rendering to texture but rendering to texture with high precision doesn't support Multisample Anti-Aliasing (MSAA). This means there's not much I can do without a huge cost, like using Fullscreen Anti-Aliasing.
There is still hope, though. An OpenGL extension named GL_EXT_framebuffer_multisample could possibly save the situation. I must take another look at it later.
Inspired by the complainment aboud jaggy edges I decided to try enabling the edges again. Jagginess still persists but it might be a bit better.

Light bleeding
If you take a close look in the fullscreen version of the picture above you can see that the shadows aren't as soft as they used to be. This is because I encountered horrible light bleeding with the variance shadows. You can see some of it in the image below. Please don't mind the burnt terrain, it was a bug in the terrain normals.
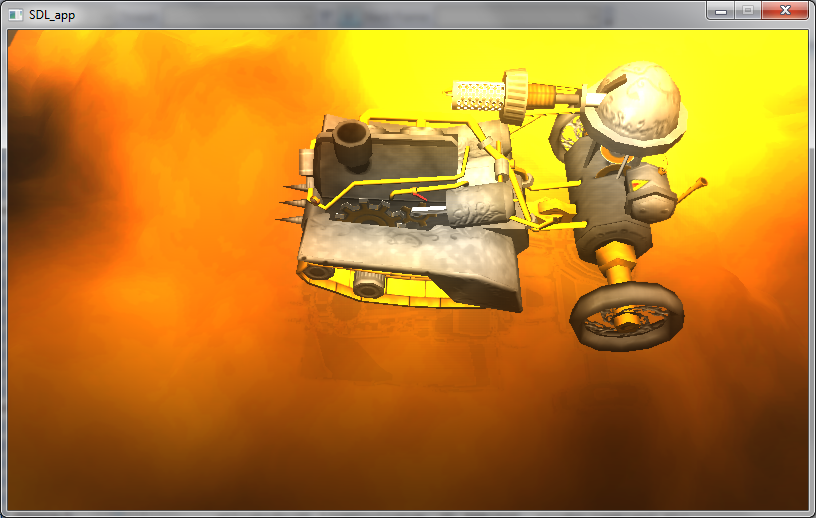
Now this doesn't look much like a shadow, does it? This is why I replaced the shadows with a quick implementation of Percentage-Closer Shadows (PCF).
Emission textures
I watched some demos from Breakpoint 2010. One of them had very impressive lighting effects. I wondered if I could produce similar effects too.
This effect is done by giving a material a high emission factor so that it is self-lit. Now that its color is very bright the bloom filter of HDR rendering gives it a nice halo, making it look very bright.
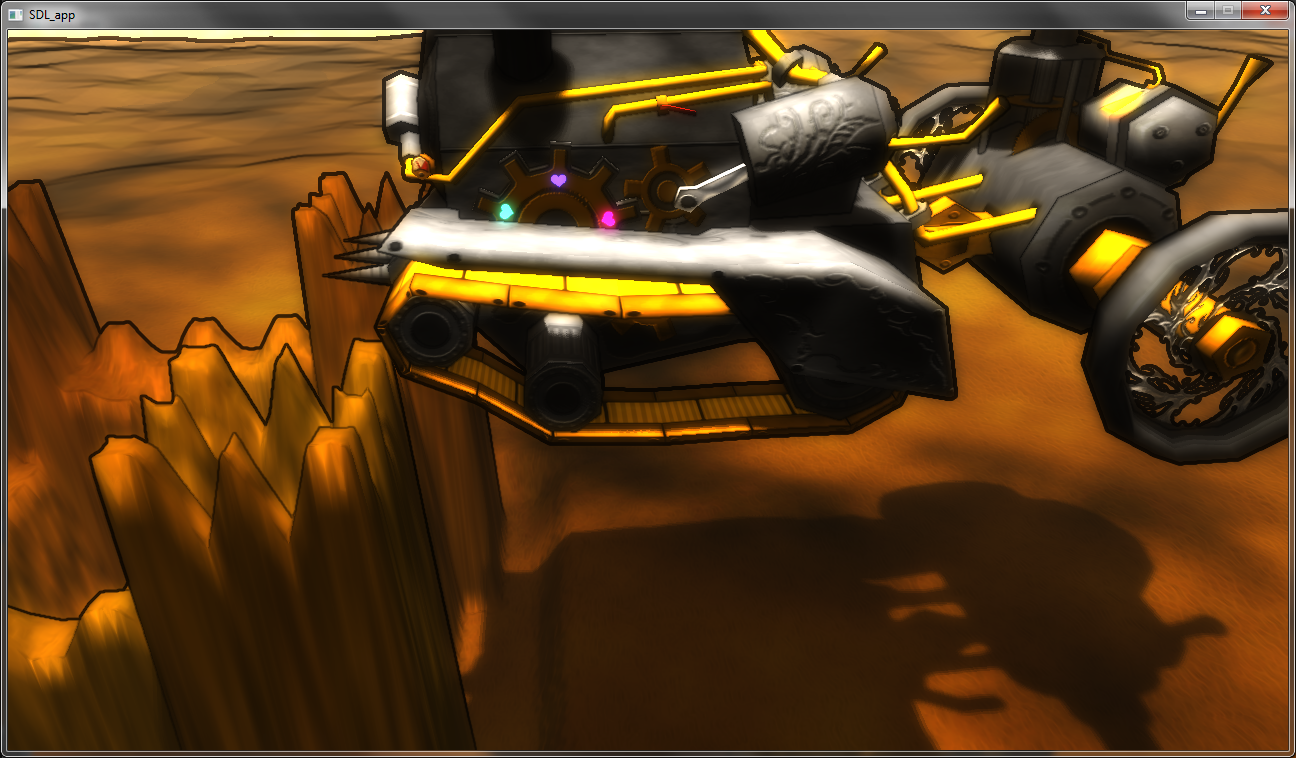
Our modeler, Juutis, had been asking for specular maps for some time. I hadn't implemented them yet since there were no free channels in our textures. But now I needed another channel for emission so it was clear that I needed to replace the traditional material-wide properties with an emission-specular-diffusion map.
Here are a few samples with some temporary hearts and a lit warning label. ;)
Cel-shading?
I took some time to play around with cel-shading. I'm not sure how well it fits a HDR rendering system, but at least I figured that cel-shading systems need a huge amount of parameter tweaking to get them to work in different lighting options.
I don't find these results very pleasing but I thought it would still be fun sharing them. But this is not the direction we'll be taking in the near future.

Monday, April 5, 2010
2010-04-05. Death to the bottlenecks
Larger VBOs for speed, yes?
While playing with the engine I noticed the steamtank looked possibly better without the dark edges so I took them off. I may put them back later though. We'll probably play around here quite a bit.
So here I was at 20 fps with a cool Steamtank. I decided to add another tank and boom, frame rate was down at 10 fps. Huh? For other computers this didn't affect the frame rate at all. Yummy.
At the moment I was using Vertex Buffer Objects of size of one mesh each, where by mesh I mean a part of model that consists of a single material. I have read that the VBO size should be kept between around half and two megabytes. Mine were closer to few dozen kilos, so maybe this was a source of slowness? I went and combined the VBOs.
Here's a screenshot I took while the process wasn't quite ready yet.

Got it ready and, oh the speed increase. Frame rate had dropped from 10 to 5 per second. Software fallback? Too large VBOs? Pfft.
No software fallback for me, please
The size of my vertex information was 76 bytes per vertex. It had vertex position, vertex normal, vertex tangent, four joint IDs and four joint weights for skeletal animation. It's said that this number should be a multiple of 32 bytes for best performance. Our model was using at most two vertex weights so we thought three vertex weights should be enough, saving 8 bytes. As the sum of the vertex weights has to be one, I could calculate the third one from the remaining two in the vertex shader. I had reached the goal of 64 bytes.
No significant performance increase.
Then something caught my eye. Everything else in the vertex information was floating point numbers but the joint numbers were integers... Like they naturally should be. I vaguely remembered that for optimal performance only floats should be used here, but at the time I read this I didn't pay too much attention to it. I tried changing them to floats and boom, the program was running at 45 frames per second. Huh!
Apparently the graphics hardware didn't support integer parameters in the vertex structure so it resorted to software fallback instead... Vertex shaders in software, no thanks.
Here's a video capture of the engine running at 40 fps on HD 4650 Mobility with resolution 1280x720.
Oh and by the way, toggling larger VBOs increases the frame rate by around one frame per second.
While playing with the engine I noticed the steamtank looked possibly better without the dark edges so I took them off. I may put them back later though. We'll probably play around here quite a bit.
So here I was at 20 fps with a cool Steamtank. I decided to add another tank and boom, frame rate was down at 10 fps. Huh? For other computers this didn't affect the frame rate at all. Yummy.
At the moment I was using Vertex Buffer Objects of size of one mesh each, where by mesh I mean a part of model that consists of a single material. I have read that the VBO size should be kept between around half and two megabytes. Mine were closer to few dozen kilos, so maybe this was a source of slowness? I went and combined the VBOs.
Here's a screenshot I took while the process wasn't quite ready yet.
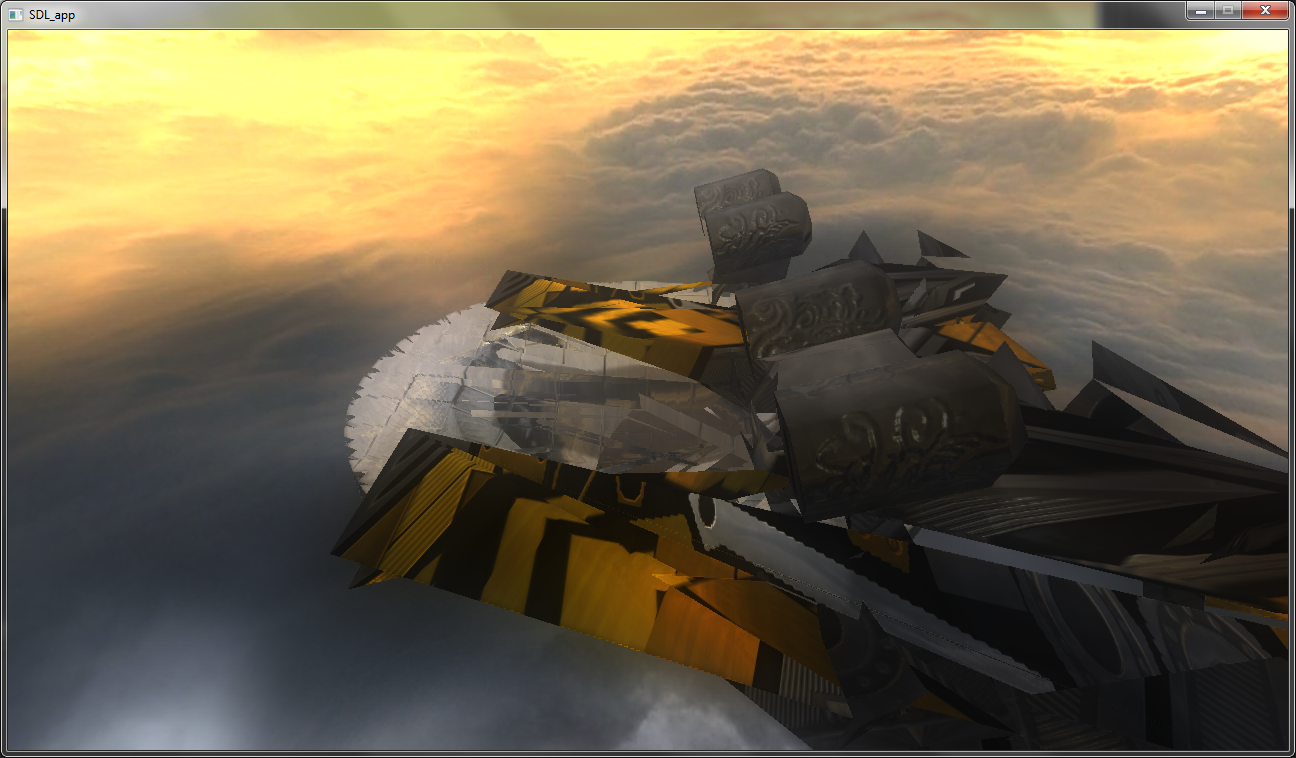
Got it ready and, oh the speed increase. Frame rate had dropped from 10 to 5 per second. Software fallback? Too large VBOs? Pfft.
No software fallback for me, please
The size of my vertex information was 76 bytes per vertex. It had vertex position, vertex normal, vertex tangent, four joint IDs and four joint weights for skeletal animation. It's said that this number should be a multiple of 32 bytes for best performance. Our model was using at most two vertex weights so we thought three vertex weights should be enough, saving 8 bytes. As the sum of the vertex weights has to be one, I could calculate the third one from the remaining two in the vertex shader. I had reached the goal of 64 bytes.
No significant performance increase.
Then something caught my eye. Everything else in the vertex information was floating point numbers but the joint numbers were integers... Like they naturally should be. I vaguely remembered that for optimal performance only floats should be used here, but at the time I read this I didn't pay too much attention to it. I tried changing them to floats and boom, the program was running at 45 frames per second. Huh!
Apparently the graphics hardware didn't support integer parameters in the vertex structure so it resorted to software fallback instead... Vertex shaders in software, no thanks.
Here's a video capture of the engine running at 40 fps on HD 4650 Mobility with resolution 1280x720.
Oh and by the way, toggling larger VBOs increases the frame rate by around one frame per second.
Saturday, April 3, 2010
2010-04-02. Alpha maps
A real model
I wrote some code for the adaptive terrain tessellation thing I told you about but I didn't test it yet so it's most probably broken. But enough of that. The topic for today is that Juutis, our 3d modeller, made us our first real model. Want to see it? Guessed so.
She's going to shoot fire and push some steam up once we're ready. And keep some good noise and be reeeeal cool! But for now, she's just our new test model. Wave farewell to Ultimato as that wormie has done her job.
So ladies and gentlemen! Please welcome... Steamtank!
Alpha maps
This version of the engine has only some minor additions. I spent much of the day debugging why some parts of the tank didn't show up. Finally I found that some vertices had vertex weights plain zero... Blame Milkshape! Seems it sometimes "forgot" to return vertex weight 1.0 when a vertex was bound to only one joint. So a few lines to our MS3D exporter and the bug was dealt with.
The other addition to the engine was alpha maps. They're as simple as it gets: if a pixel has alpha value below 0.5, discard it. You can see the effect in some of the wheels of the steamtank. They are just rotating rectangles with a bump map and an alpha map. But they look so real. Pretty cheap.
...
Though to be honest, this is not cheap at all. My frame rate dropped from 35 back to 20 due to this new model. I'm not sure where the bottleneck is but I really need to do something. Texture fetches? But I like the environment map... :(
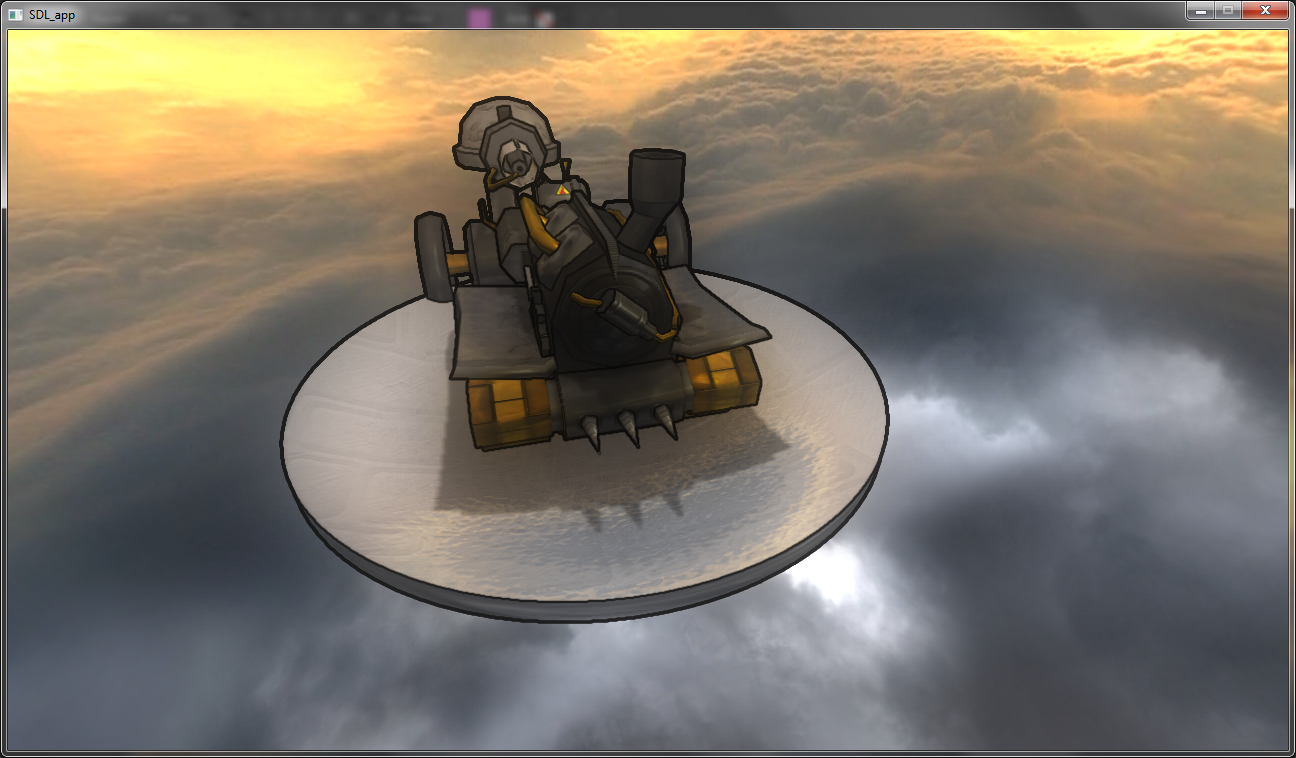
Edit: Some more images with another environment map (original by Hipshot)


I wrote some code for the adaptive terrain tessellation thing I told you about but I didn't test it yet so it's most probably broken. But enough of that. The topic for today is that Juutis, our 3d modeller, made us our first real model. Want to see it? Guessed so.
She's going to shoot fire and push some steam up once we're ready. And keep some good noise and be reeeeal cool! But for now, she's just our new test model. Wave farewell to Ultimato as that wormie has done her job.
So ladies and gentlemen! Please welcome... Steamtank!
Alpha maps
This version of the engine has only some minor additions. I spent much of the day debugging why some parts of the tank didn't show up. Finally I found that some vertices had vertex weights plain zero... Blame Milkshape! Seems it sometimes "forgot" to return vertex weight 1.0 when a vertex was bound to only one joint. So a few lines to our MS3D exporter and the bug was dealt with.
The other addition to the engine was alpha maps. They're as simple as it gets: if a pixel has alpha value below 0.5, discard it. You can see the effect in some of the wheels of the steamtank. They are just rotating rectangles with a bump map and an alpha map. But they look so real. Pretty cheap.
...
Though to be honest, this is not cheap at all. My frame rate dropped from 35 back to 20 due to this new model. I'm not sure where the bottleneck is but I really need to do something. Texture fetches? But I like the environment map... :(
Edit: Some more images with another environment map (original by Hipshot)

Friday, April 2, 2010
2010-04-01. Deferred shading
HDR shading improved
I spent a few days improving the conversion curve from HDR to LDR [see previous post]. I divided the screen into 5x5 sub-screens and rendered the same view with five different curve types and parameters. Then I dropped the worst looking curves, saved the best ones and "zoomed in" to fine-tune the parameters.
The HDR->LDR conversion system also includes a dynamically changing shutter time of the camera. It's not very visible in this homogenous lighting but it makes the scene look very beautiful in darkness too. Think of entering a dark tunnel... Yum!
Here's a shot with an abstract skeletal animated worm.
Deferred shading
When I uploaded the last video the frame rate was around 20 fps at resolution 1280x800 on my ATI Mobility HD 4650, which is around half speed of GeForce 8800 GT. Even though it's clear there was a bottleneck, most of the time was spent in constant time postprocessing effects. This is good because it means adding triangles won't make it slower.
I was able to remove many rendering steps by entering the world of deferred shading. This means I no longer render the objects straight, calculating the lighting as I go. Instead I save vertex normals, texture colors and material parameters of each pixel into textures, and then in another pass I calculate the lighting for each pixel based on these. This way I only need to calculate lighting for those pixels that are actually shown.
On top of this I took the edge detect shader (sobel) and combined it with the blur shader; they both need to be applied to make good edges. For those interested in details, I just combined the sobel kernel and the blur 1-2-1 kernel, resulting in a single rendering pass. I went even further and combined this blurred sobel shader with the HDR->LDR conversion shader into a single rendering pass. In the end I had FPS 35, which is a HUGE improvement. Yippee!
...
Next up is showing some terrain with adaptive tessellation. Without the fancy words it means the triangle mesh will be more accurate where needed, just like it should. And the terrain will be rendered in less accuracy when it's far away. Wish me luck.
I spent a few days improving the conversion curve from HDR to LDR [see previous post]. I divided the screen into 5x5 sub-screens and rendered the same view with five different curve types and parameters. Then I dropped the worst looking curves, saved the best ones and "zoomed in" to fine-tune the parameters.
The HDR->LDR conversion system also includes a dynamically changing shutter time of the camera. It's not very visible in this homogenous lighting but it makes the scene look very beautiful in darkness too. Think of entering a dark tunnel... Yum!
Here's a shot with an abstract skeletal animated worm.
Deferred shading
When I uploaded the last video the frame rate was around 20 fps at resolution 1280x800 on my ATI Mobility HD 4650, which is around half speed of GeForce 8800 GT. Even though it's clear there was a bottleneck, most of the time was spent in constant time postprocessing effects. This is good because it means adding triangles won't make it slower.
I was able to remove many rendering steps by entering the world of deferred shading. This means I no longer render the objects straight, calculating the lighting as I go. Instead I save vertex normals, texture colors and material parameters of each pixel into textures, and then in another pass I calculate the lighting for each pixel based on these. This way I only need to calculate lighting for those pixels that are actually shown.
On top of this I took the edge detect shader (sobel) and combined it with the blur shader; they both need to be applied to make good edges. For those interested in details, I just combined the sobel kernel and the blur 1-2-1 kernel, resulting in a single rendering pass. I went even further and combined this blurred sobel shader with the HDR->LDR conversion shader into a single rendering pass. In the end I had FPS 35, which is a HUGE improvement. Yippee!
...
Next up is showing some terrain with adaptive tessellation. Without the fancy words it means the triangle mesh will be more accurate where needed, just like it should. And the terrain will be rendered in less accuracy when it's far away. Wish me luck.
2010-03-28. HDR Rendering
Sobel filters
Last night before I went to bed I read about the so called sobel operator that is often used to find edges in images in programs like Photoshop. The filter basically gives every pixel a number that is large for large differences
in adjacent pixels. This was a very easy algorithm to implement.
Running the filter against image data would be a bad idea though. To find the edges I had extracted the shape of the surface (normals and depth values) from the partially rendered image. When I run the sobel filter against this data I get large values wherever there is a jump in the shape. Exactly what I want!
But this gives equally sized edges everywhere and to be honest it looks quite bad. Fortunately the values of the sobel filter often go much above 1 which is the maximum I can use. I figured if I blur these values I get wider edges where the shape had larger jumps.
HDR rendering
Today I read some papers about High Dynamic Range imaging. Be sure to see some images Google gives when asked for "HDR", they're very cool. The idea is that normally every pixel rendered has to have color values between 0 and 1 and this leaves the image very flat. The sun can be dozens of times brighter than a room so they simply don't fit in the same range.
To fix this the scene is first rendered without this cramping restriction. Only after everything has been drawn completely to a texture, with color values more like between 0 and 100, the image is downscaled back to between 0 and 1 by some curve. This gives a very satisfying result, though finding a curve good enough takes time.
...
Oh and by the way, the fps I get on this laptop keeps going down. A few days ago I was still 60. Then I added soft shadows, rendering normals and depths to textures and all kinds of post processing effects like HDR rendering.
Everyone of those rendering phases basically takes 2 to 5 fps down. Now I'm at 20. I hope I won't need any more ;)
Last night before I went to bed I read about the so called sobel operator that is often used to find edges in images in programs like Photoshop. The filter basically gives every pixel a number that is large for large differences
in adjacent pixels. This was a very easy algorithm to implement.
Running the filter against image data would be a bad idea though. To find the edges I had extracted the shape of the surface (normals and depth values) from the partially rendered image. When I run the sobel filter against this data I get large values wherever there is a jump in the shape. Exactly what I want!
But this gives equally sized edges everywhere and to be honest it looks quite bad. Fortunately the values of the sobel filter often go much above 1 which is the maximum I can use. I figured if I blur these values I get wider edges where the shape had larger jumps.
HDR rendering
Today I read some papers about High Dynamic Range imaging. Be sure to see some images Google gives when asked for "HDR", they're very cool. The idea is that normally every pixel rendered has to have color values between 0 and 1 and this leaves the image very flat. The sun can be dozens of times brighter than a room so they simply don't fit in the same range.
To fix this the scene is first rendered without this cramping restriction. Only after everything has been drawn completely to a texture, with color values more like between 0 and 100, the image is downscaled back to between 0 and 1 by some curve. This gives a very satisfying result, though finding a curve good enough takes time.
...
Oh and by the way, the fps I get on this laptop keeps going down. A few days ago I was still 60. Then I added soft shadows, rendering normals and depths to textures and all kinds of post processing effects like HDR rendering.
Everyone of those rendering phases basically takes 2 to 5 fps down. Now I'm at 20. I hope I won't need any more ;)
Subscribe to:
Posts (Atom)